Almost all of our work in Port-au-Prince, Haiti has consisted of repairing hand pumps on the thousands of broken wells scattered around the city. Many of them were put in by large NGOs to provide a free, public water source, but unfortunately are ill-maintained and over-used. The harsh conditions of Haiti’s environment coupled with frequent use lead to hand pumps breaking down in one capacity or another every couple of years. This leads an entire community, dependent on that well for water, to walk further to the neighboring community to get water, which then leads to the overuse of yet another hand pump.
Our amazing well repair team gets calls every day from communities that need their hand pump repaired. For around $800 we can restore access to clean water for a large community in just a few hours of hard work.
Many people ask why communities can’t repair their own wells, and unfortunately, when unskilled community members try to fix a hand pump without the proper tools, it can lead to the pipes and sucker rods falling down the borehole beyond reach. And that renders the well unusable until the pipes can be drug back up. Our well repair team has specific clamps, safety blocks, and specific wrenches to ensure the pipes stay within reach. Additionally, we often see pipes like this that are rusted through and need replacing, at a cost simply out of reach for most communities.
We thought you might like to see exactly how a well repair is done, so come along with us and see!

Our Water Technician Pitterson (left) talking with one of the community leaders about the broken well
Step 1
First, after arriving at the site of the well-repair, we inspect the well in its current state and talk to leaders in the community about the problems they are having with it, how long its been broken, etc.
Step 2
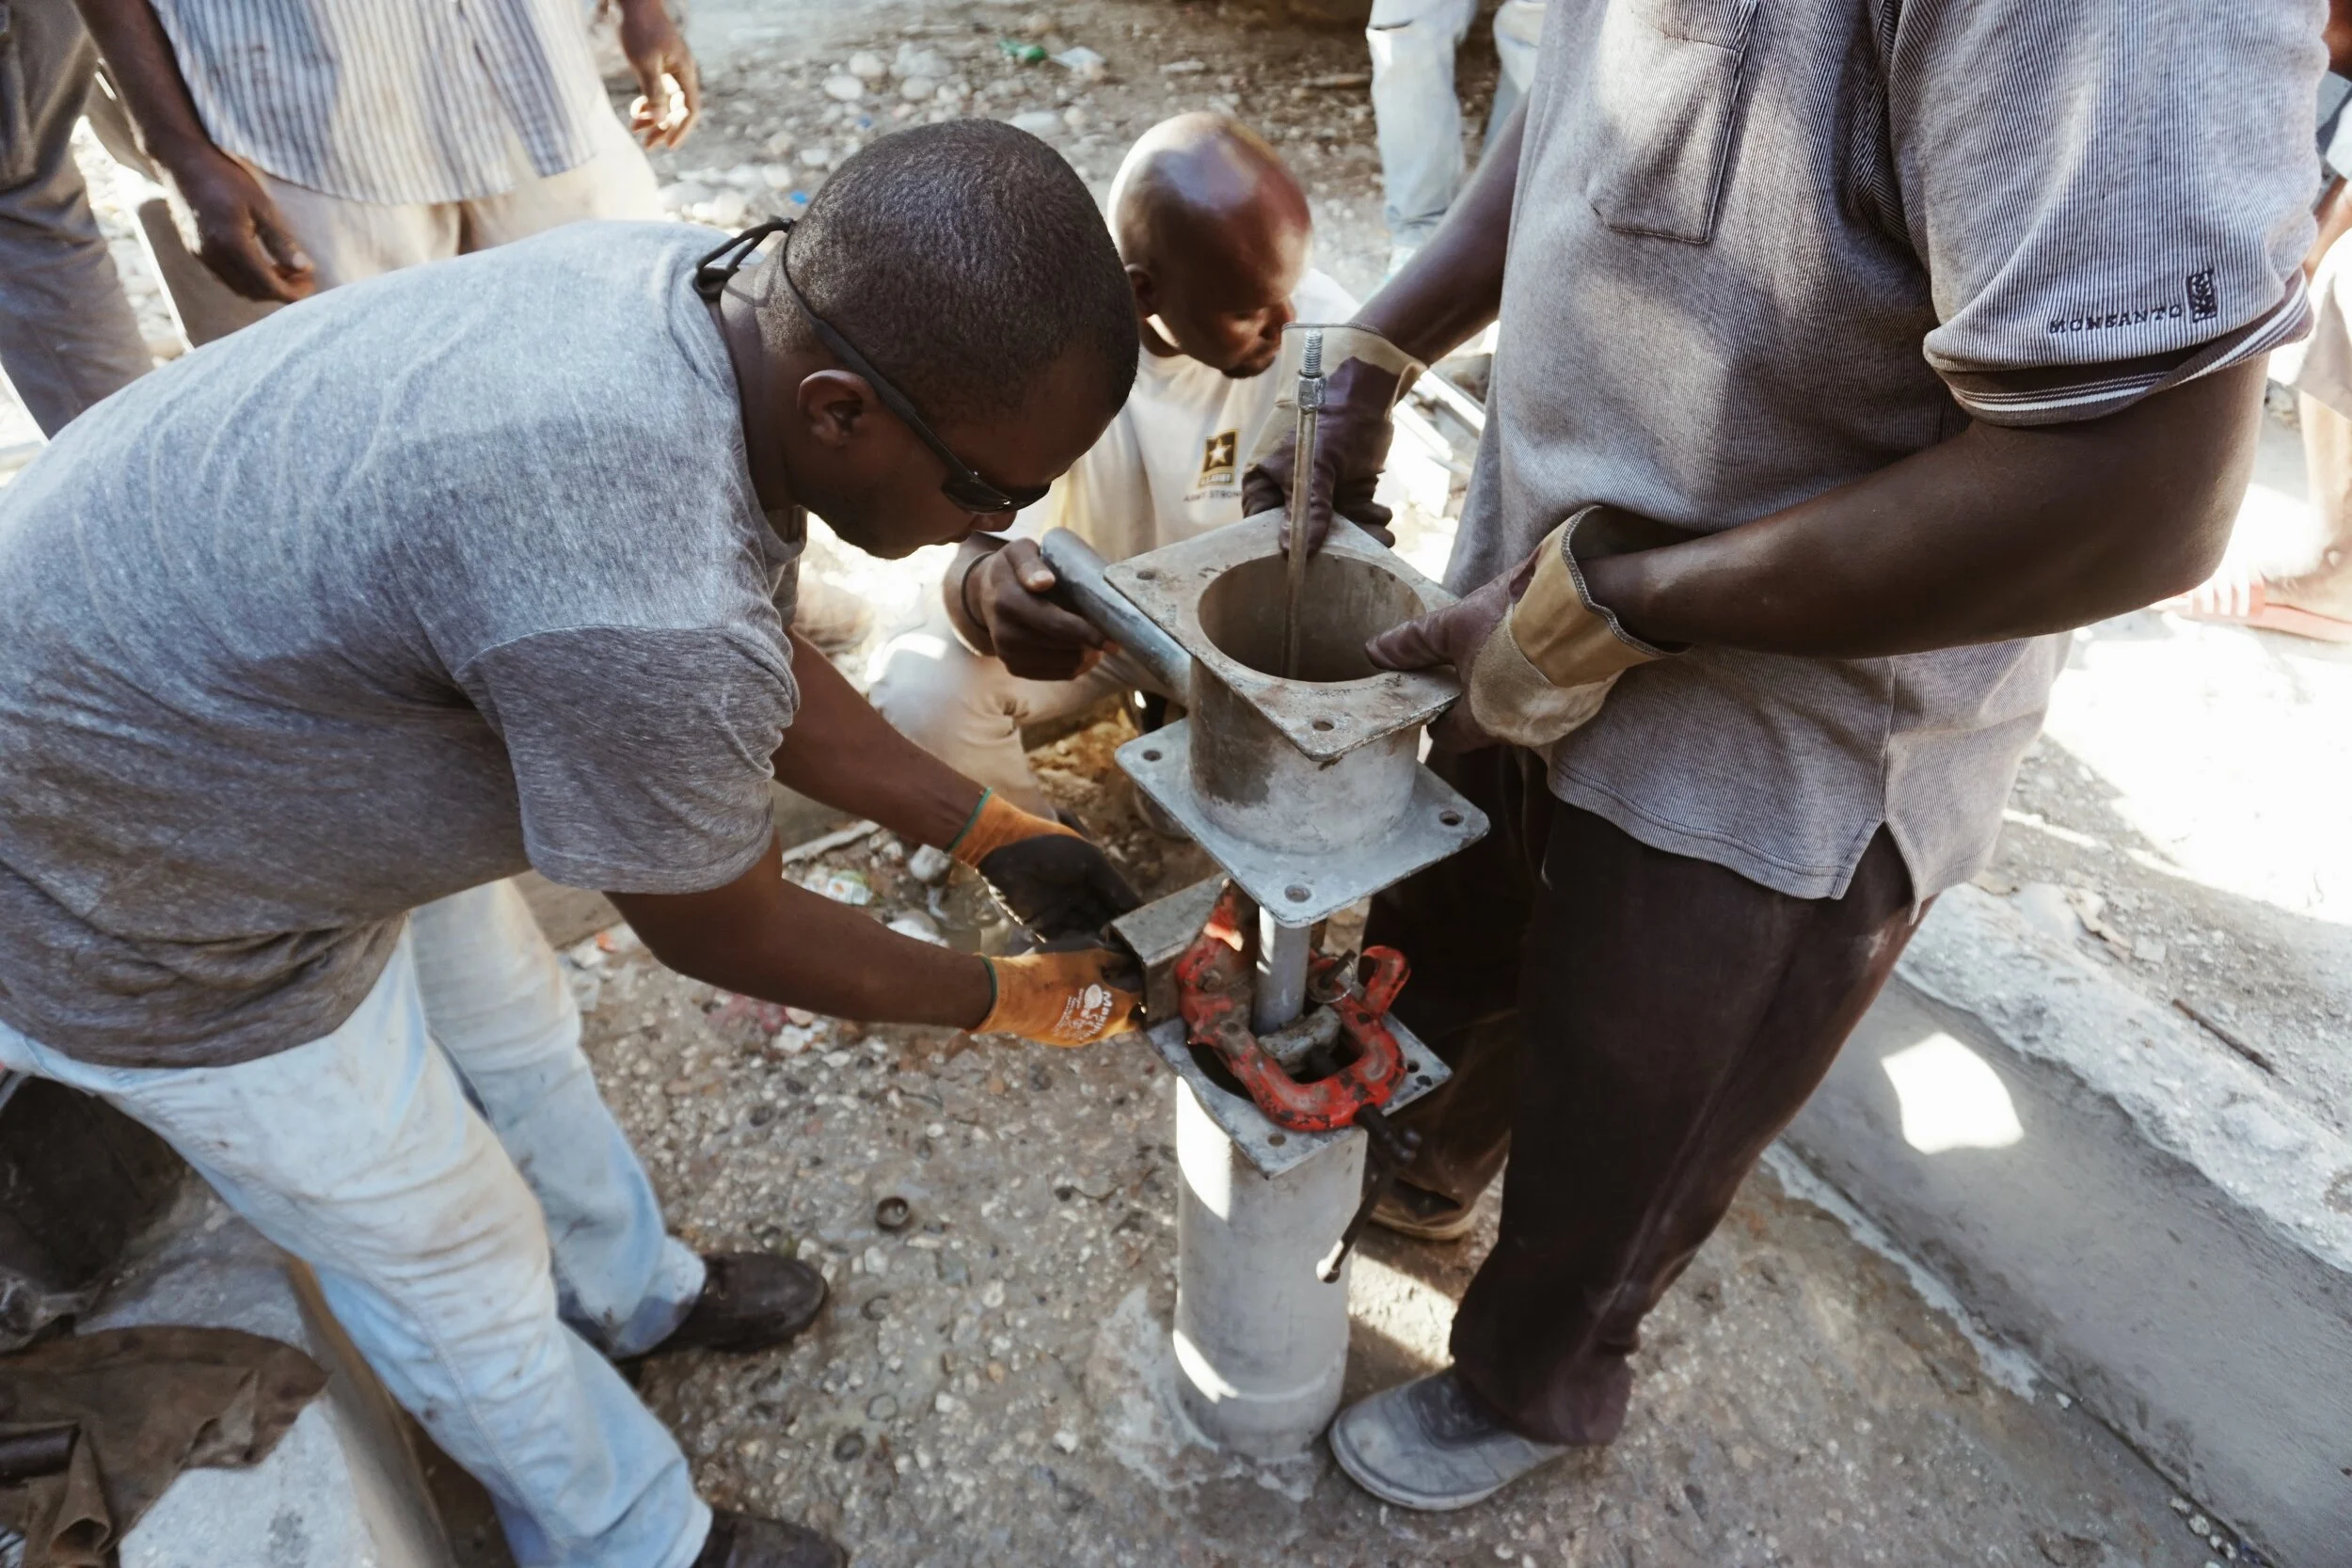
Then, we start the repair process by removing the old parts from the well (the head, handpump, spout, and then the pipes, rods, and pump). This is done by lifting each pipe out of the well one-by-one until they are all out. It usually takes 3 or 4 people to lift each pipe!

Our team in Haiti lifting a pipe out of the well
Step 3
Once these are removed, we inspect all of the parts for damages. We try to refurbish any parts that are salvageable, and any parts that are too worn out we discard.

Pitterson refurbishing the well pump

Another team member refurbishing the pump casing
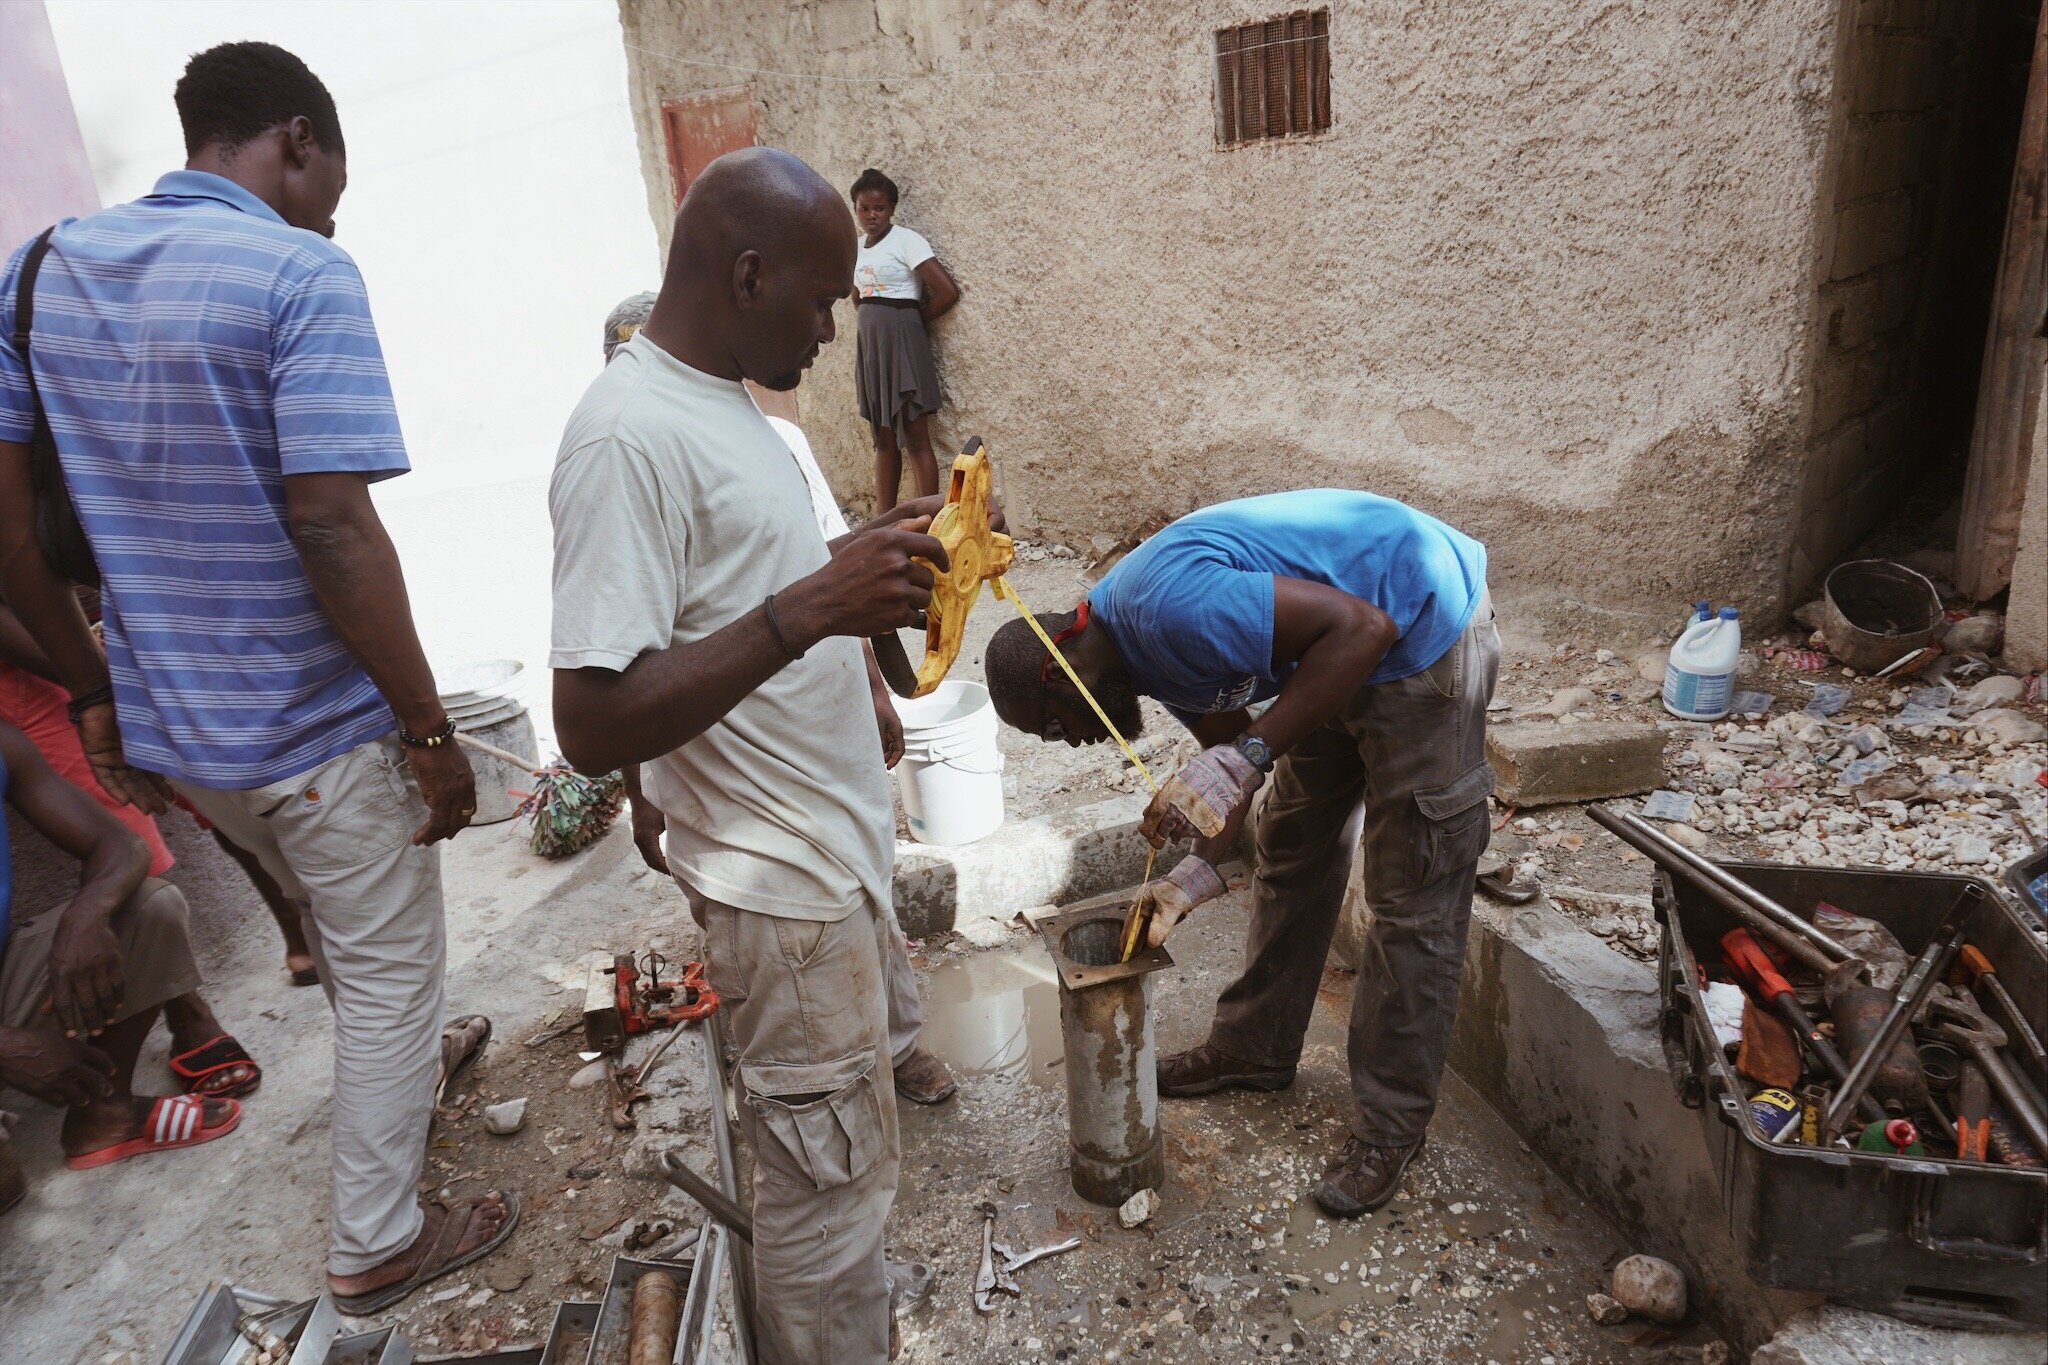
Our partners Jean and Pitterson measuring the depth of the water
Step 4
Next we measure the depth of the well. This is done by using a weight attached to the end of a tape measure and dropping it down the well. We measure both the distance from the surface to the water, and the depth of the water itself to know exactly how many pipes we ill need to install.
Step 5
We pour a chlorine solution into the well that will kill any bacteria or contaminants that may have gotten into the well while removing the old parts, or new bacteria that will get in while we install the new parts.

One of our water technicians adding the chlorine solution to the well to kill bacteria

Our Country Director Jean reinstalling the refurbished pump
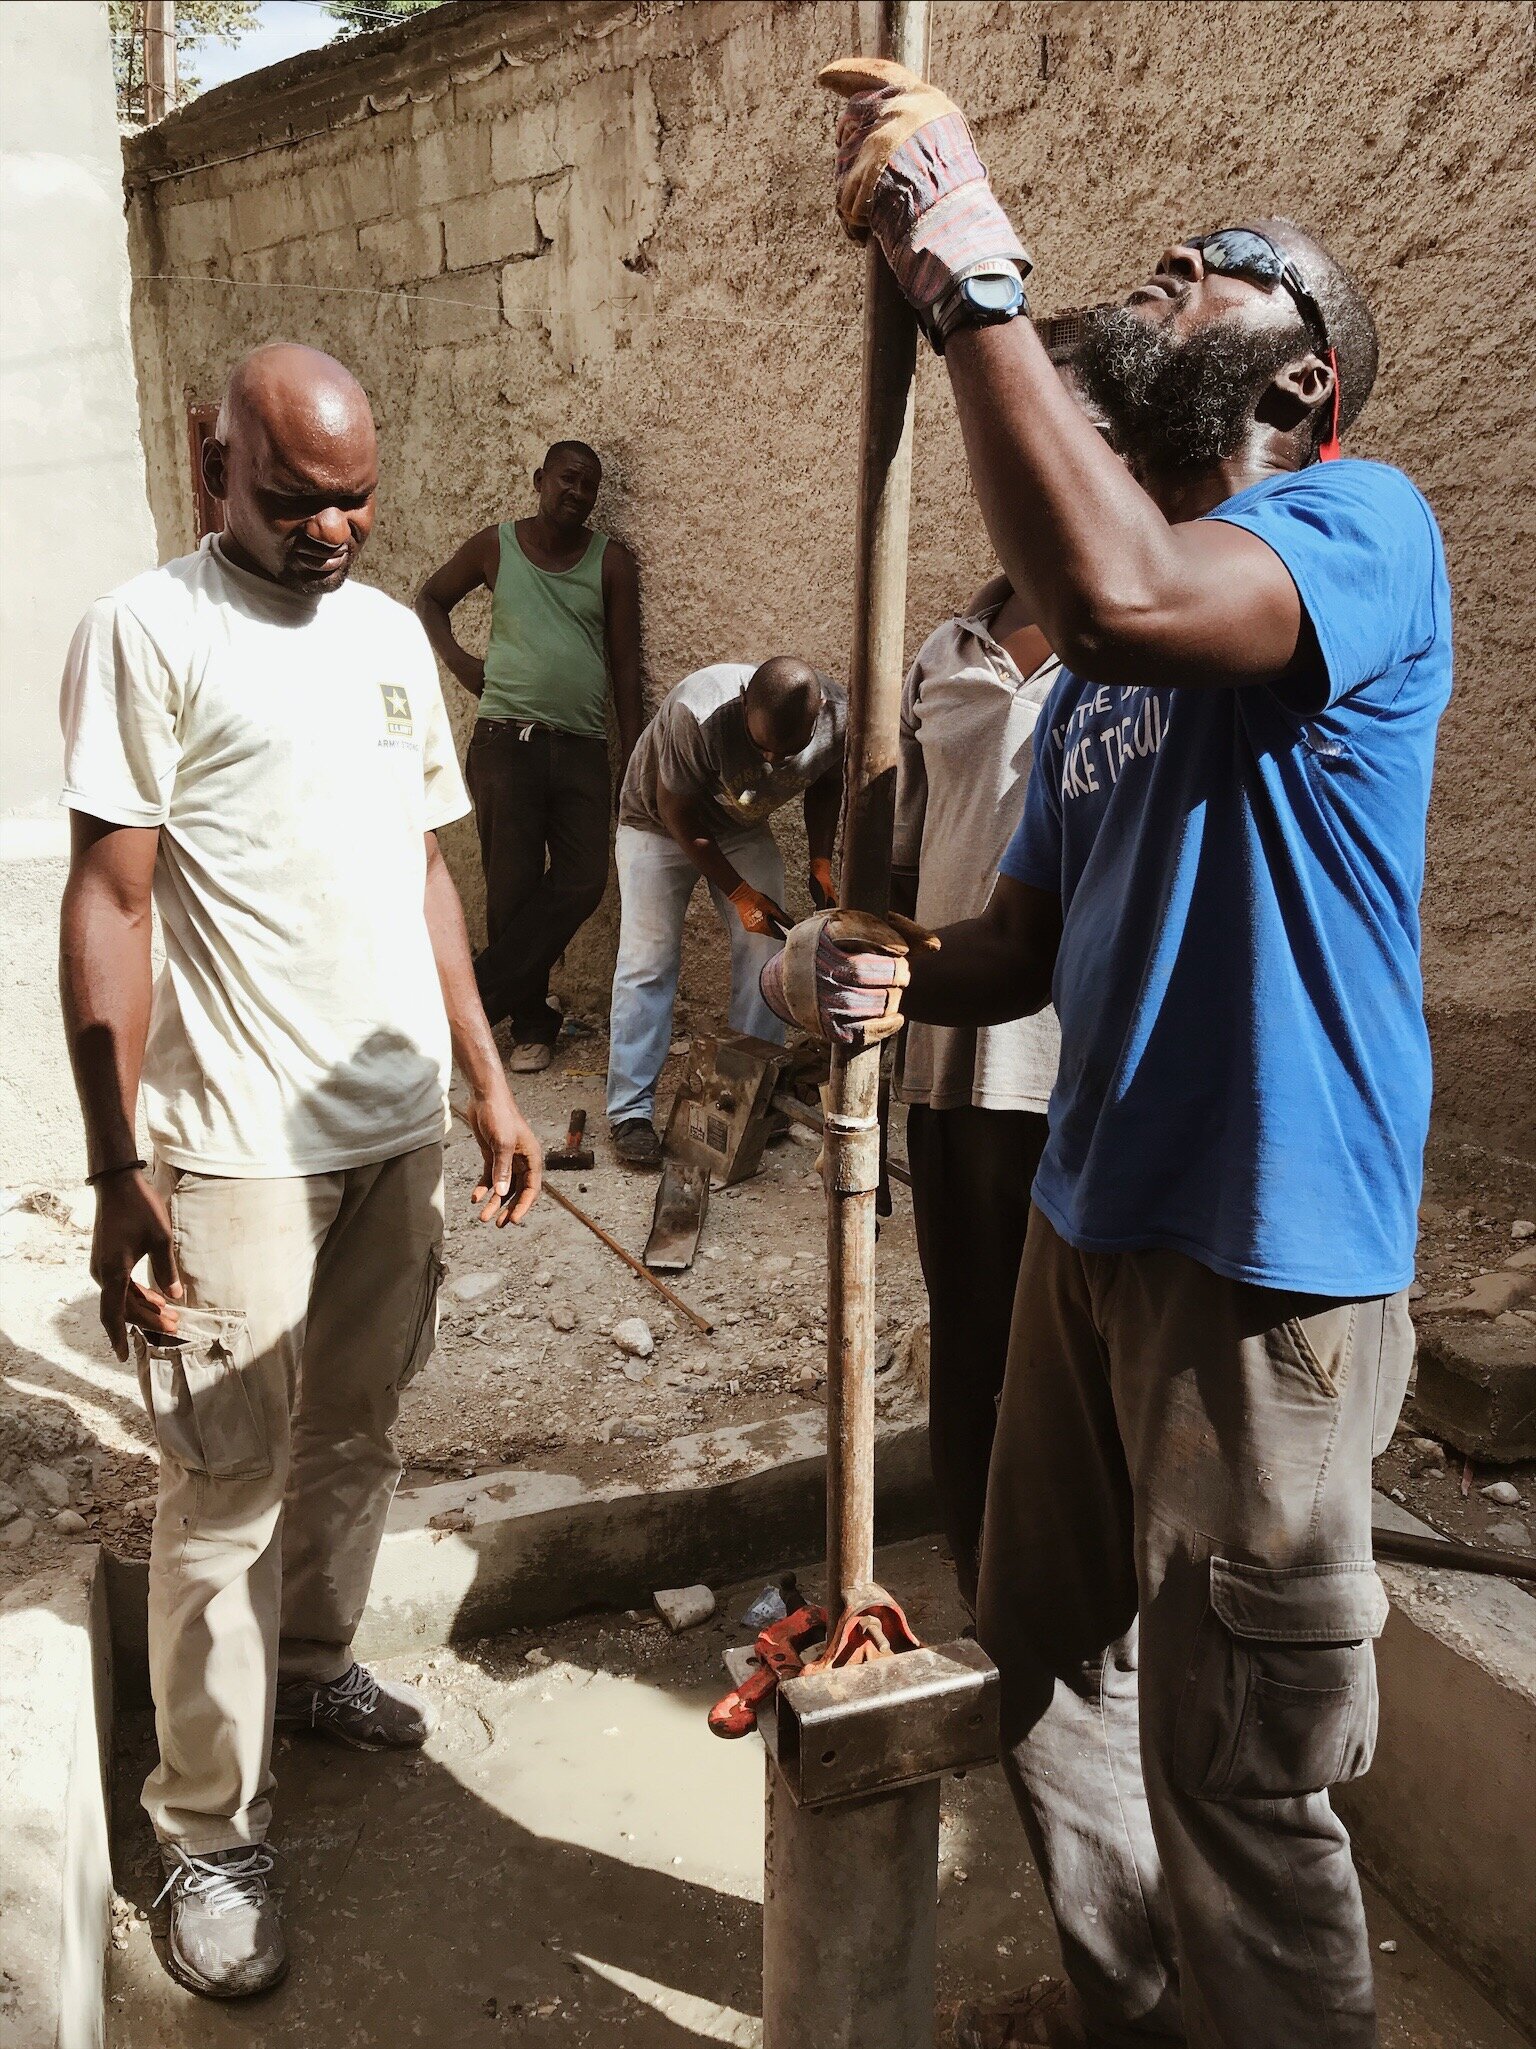
Our team lowering new pipes into the well
Step 6
We then connect the pump (new or refurbished) to the first piece of new pipe. We lower the pump and pipe into the well, and then add on additional pipes until the pump is submerged in the water.

Our team screwing on the spout

Our team screwing on the head and handle
Step 7
We then install the spout, head, and hand pump (new or refurbished) on top of the well.
Pumping out the old water until it runs clear
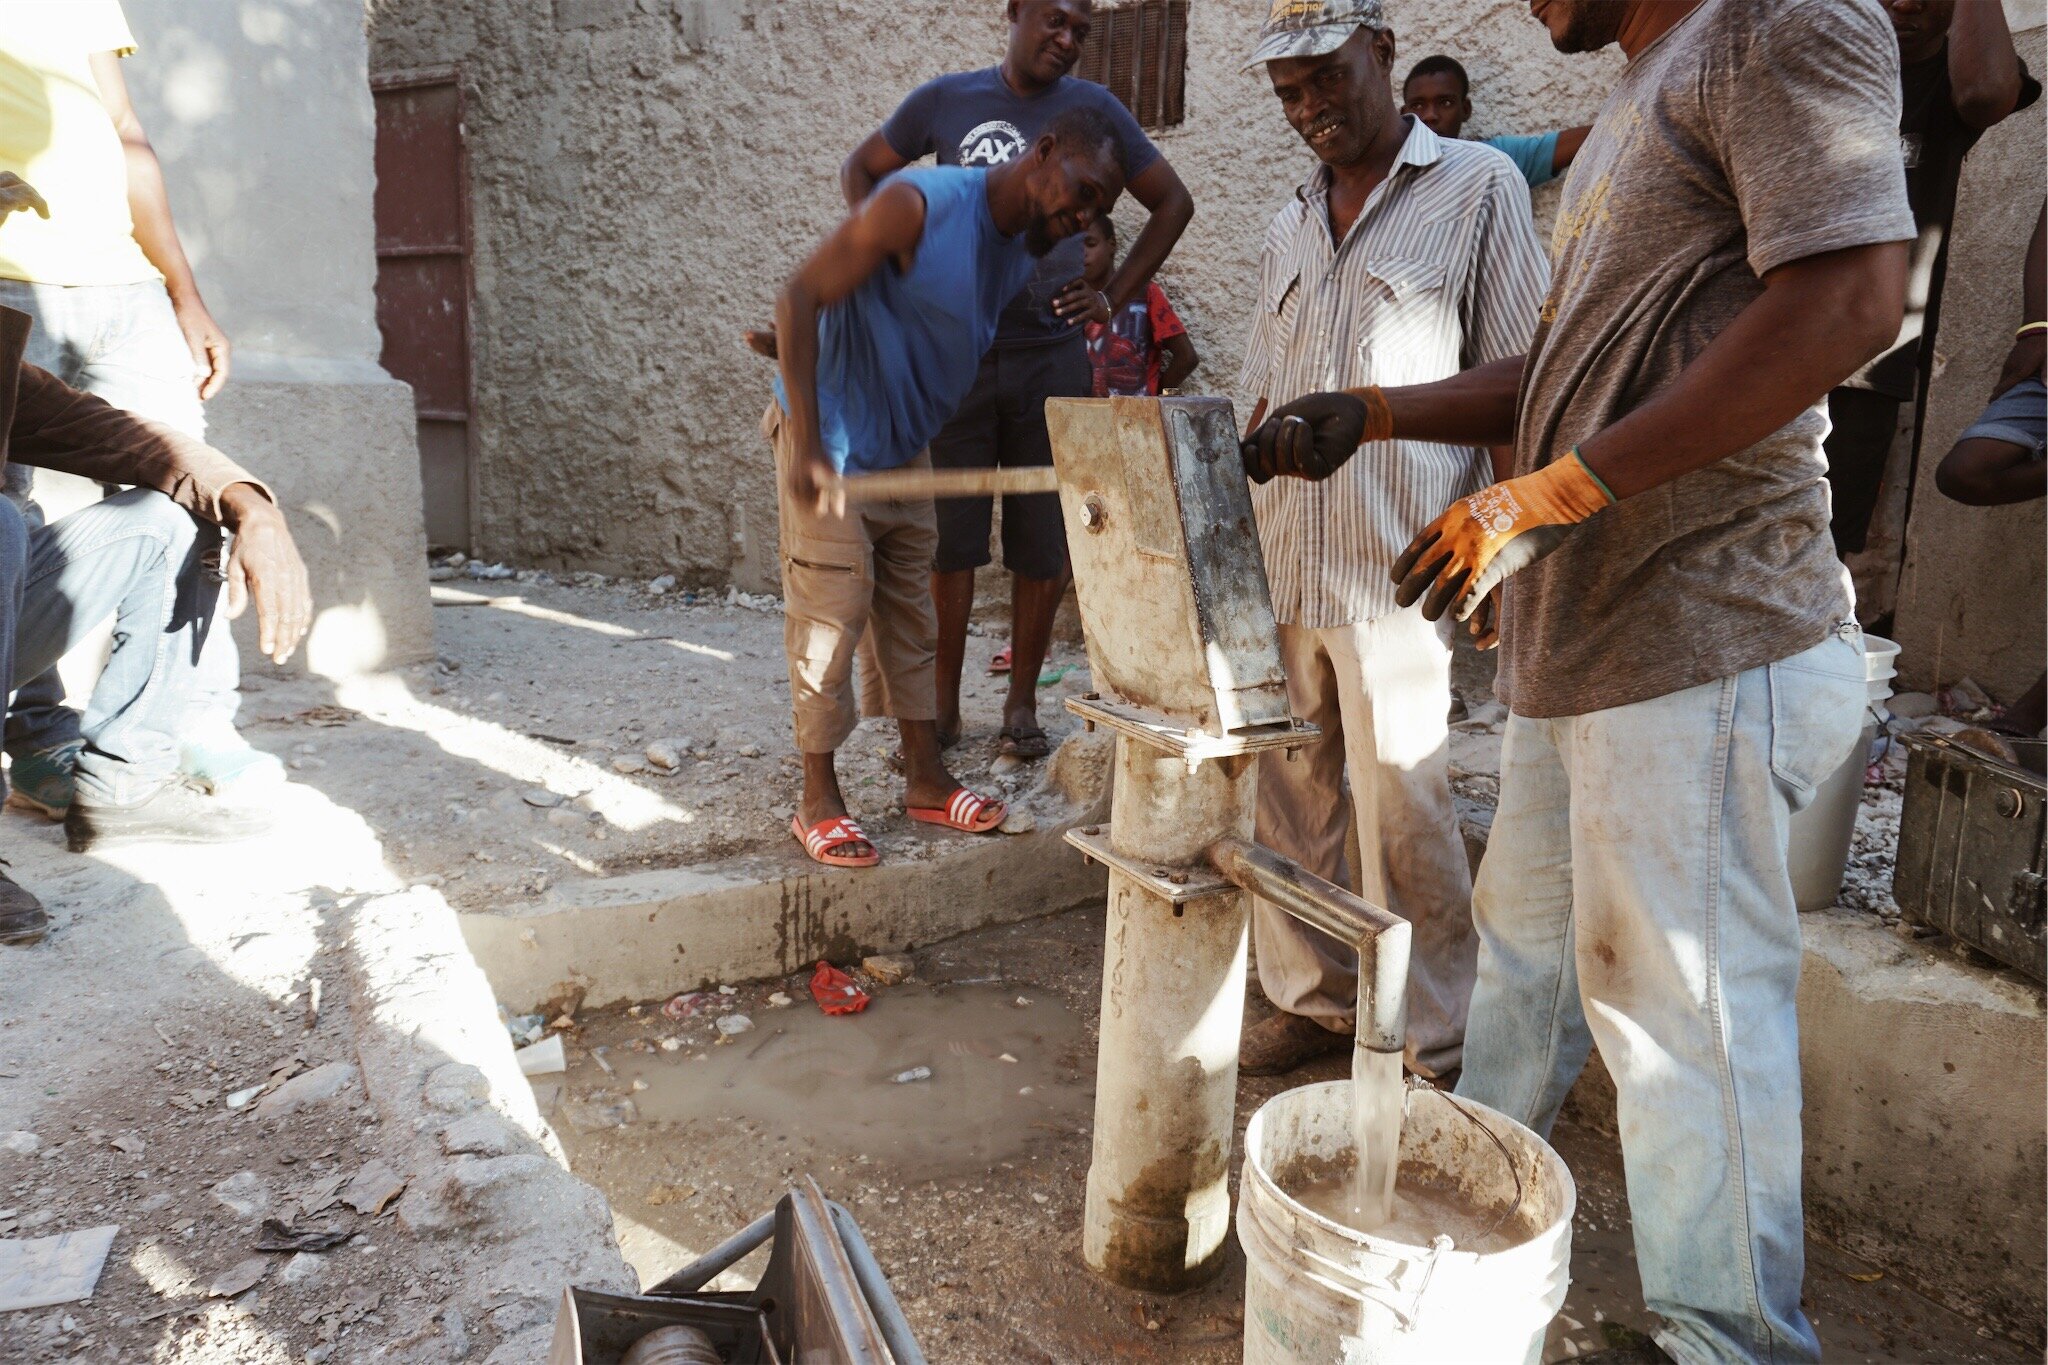
Step 8
Final step! Once everything is screwed into place, we pump the hand-pump for about 20 minutes, or until the water begins to run clear. This is to remove the old water that has been sitting in the well since its last use, and also to mix the chlorine solution into the water so that it will be safe to drink.
This well repair is a compilation of several photos from repairs completed in February 2020. For more information on all our other projects in Haiti visit our Haiti Projects Page.